DHAN API SETUP AND CONFIGURATION
-
Setup your Broker api details in settings - Login to dhan.co and go to your profile page . Profile icon -> "My profile on Dhan" .
- Go to "Profile & Account Details". Note your "Client Id" .
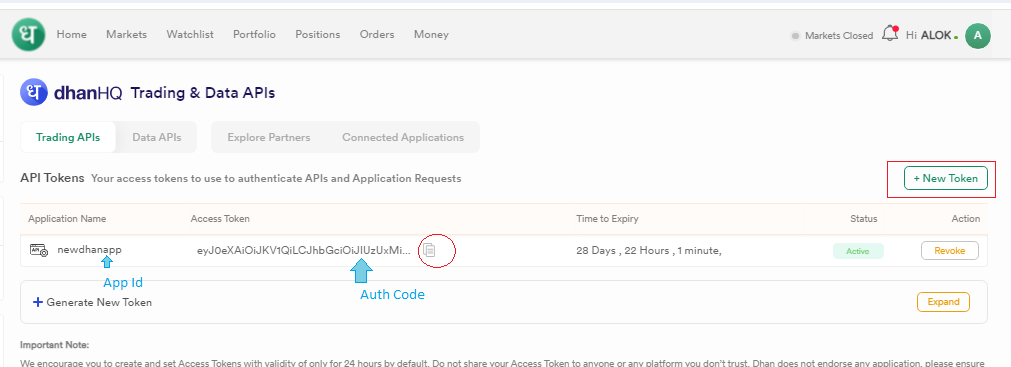
- Go to "DhanHQ Trading APIs". Add a new token.
- Give your application name something like 'yournamedhanapp'
- Choose your token validity accordingly i.e. 7 days.
- Postback URL can be optional
- Note your "Application Name" and "Access Token".
-
- Now add the above information in settings -> '+Add Broker'.
- Choose broker as dhan
- Enter "Client Id" in BrokerId field and "Application Name" in 'AppId' field.
- Leave secret key and redirect url blank for dhan.
-

- click submit. It will save your details a create a new record below
- Generate the Access token
- Enter the "Access Token". in 'Auth Code' and click on 'Generate'.
-

- If "Access Token" is expired just recreate the access token and update the 'Auth code'.
- If your token is working , then the status should show in green and active
- Click on default option to set this as your default broker.
- Click on Funds to get your funds detail
-
Set your default configurations settings - From Default configuration section set your Banknifty and Nifty
- Set your default Strike price Range and Default lot size
- Set your current and Next expiry dates
- Place your trades from Trade Page